
You’ve likely heard the term Camel toe before, and if you’re in the photography world, you know it’s something that often needs addressing. In the context of photography, “camel toe” refers to the visual effect created when tight-fitting clothing emphasizes the outline of a woman’s genitalia. It’s something that can show up unexpectedly in a photograph, especially in fashion or portrait photography.
Now, you might be wondering why this effect is often considered undesirable. Well, it can be seen as a distraction, pulling focus away from the subject’s face or the overall composition of the image. While this issue might be common, there are effective ways to address it. With the power of Photoshop, you can deftly edit out the camel toe, leaving your image looking polished and professional. Intrigued?
I’ll walk you through the very techniques you’ll need to master this aspect of photo retouching. Whether you’re a seasoned pro or just getting started, you’ll find this guide handy in making your photos look their absolute best.
How to Photoshop Camel Toe Out
So, you’ve spotted the infamous camel toe in one of your photos, and you’re ready to make it vanish like a true Photoshop expert. Let’s get started.
1. Open the image and create a duplicate layer
First things first, open up the image in Photoshop. Before you make any changes, create a duplicate layer. Why? This way, you’re working on a copy of the original image, and if anything goes awry, you’ve got a safety net. Simply right-click on the background layer and choose “Duplicate Layer.” Voila! You’re ready to roll.
2. Select the area to be retouched
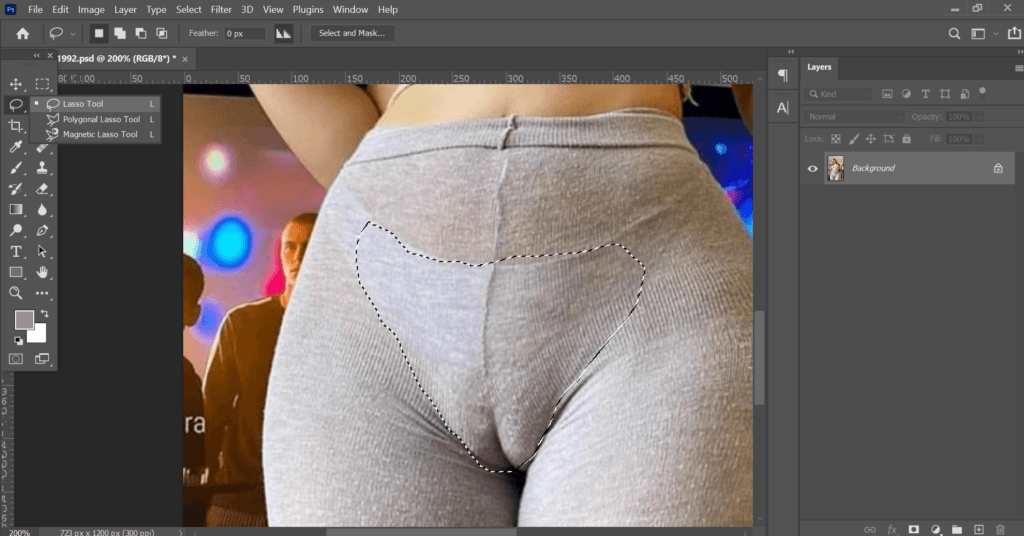
Next, zoom in on that area that needs a little love. Use the Lasso Tool or the Pen Tool to select it. Don’t worry if it’s imperfect; you can always feather the edges to smooth the transition.
3. Use the clone stamp tool to blend the area
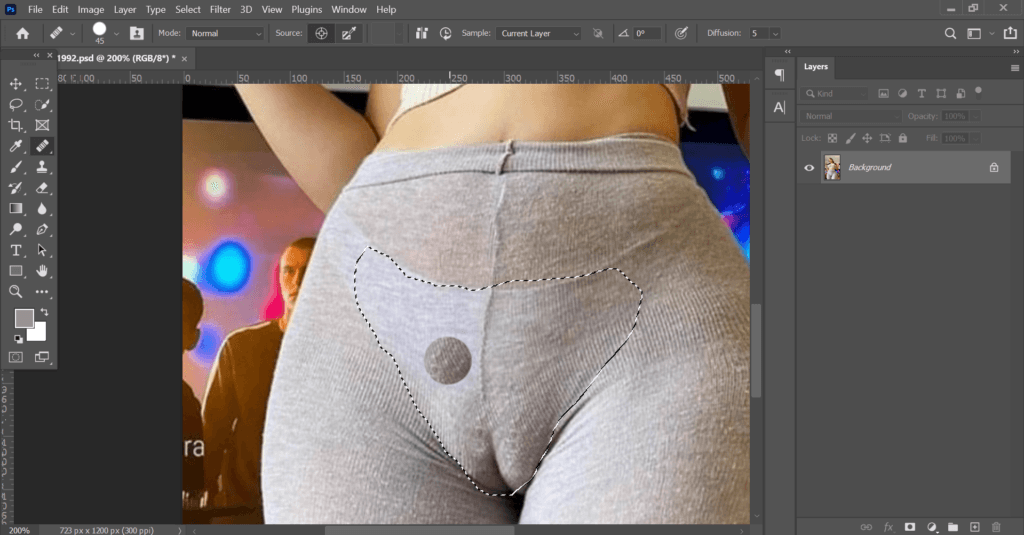
Now the real magic begins. Grab the Clone Stamp Tool from the toolbar, hold down the Alt key to sample a nearby area that looks the way you want, and then gently brush over the camel toe. This tool essentially copies pixels from one area and pastes them onto another, helping you blend that distracting outline away.
4. Apply the healing brush tool for a seamless effect
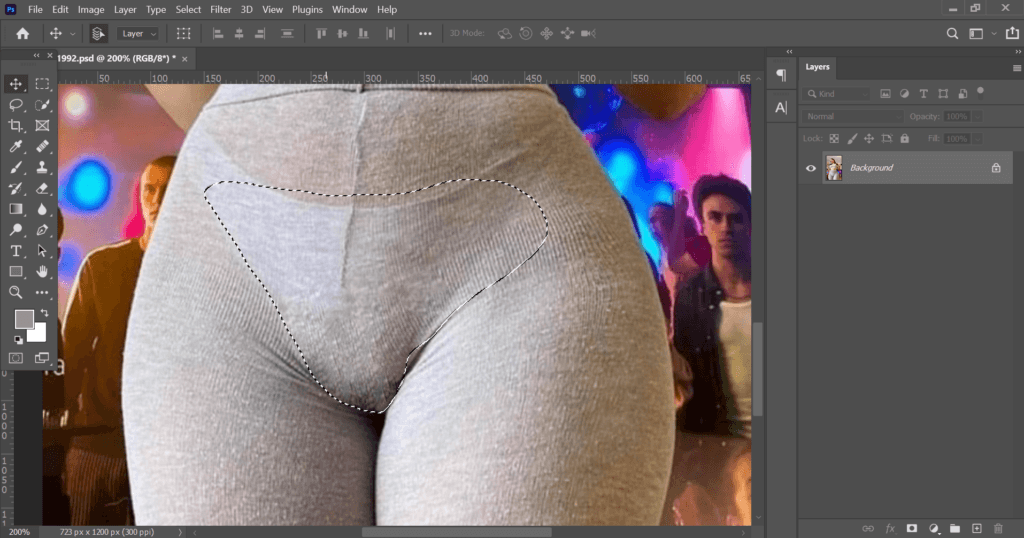
If you are still seeing some evidence, then it is time to bring in the Healing Brush Tool. It works similarly to the Clone Stamp Tool but adds an extra layer of blending to make everything look natural. Think of it as the finishing touch to make everything mesh together flawlessly.
5. Fine-tune with adjustments and shadows
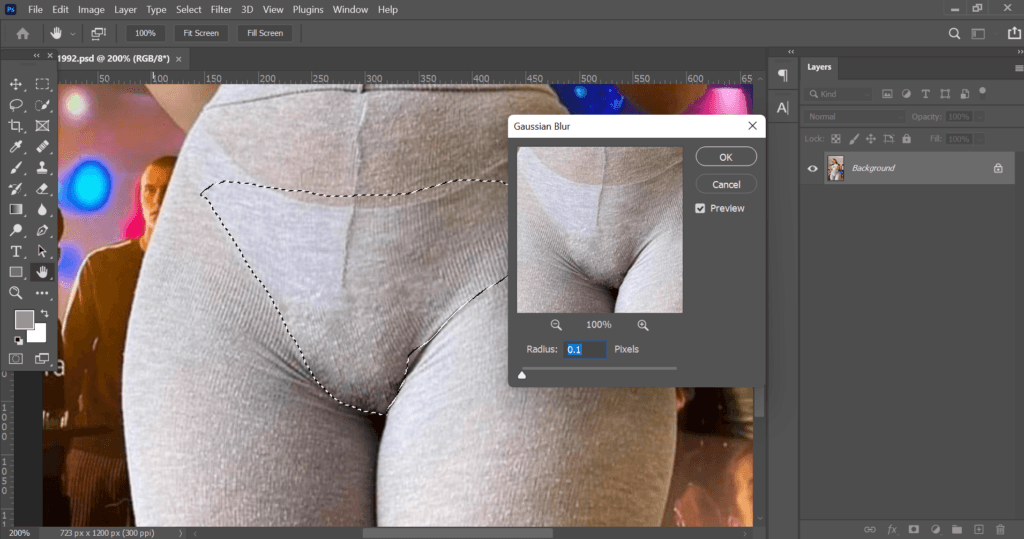
You’re almost there! Check the whole image and see if it looks natural. You might want to play around with adjustments like brightness, contrast, or shadows to make sure everything is in harmony. Remember, subtlety is key here.
6. Save the edited image

And just like that, you’re done! Save your edited image, and give yourself a pat on the back. You’ve successfully navigated the waters of Photoshop to make a common but tricky issue disappear.
Conclusion
You’ve just learned some tried-and-true techniques to fix that tricky camel toe issue in photos. But don’t stop there. Consider this your invitation to get creative and experiment with different tools and techniques. Photoshop is a vast playground for photographers and editors, and there’s always something new to discover.
Maybe next time, you can blend a combination of filters to create a unique effect or dive into advanced masking techniques.